Steps to Set Up CRM Sync on an Automation
The module is designed to require minimal code to set up- for many use cases, you only need to add a single line of code.
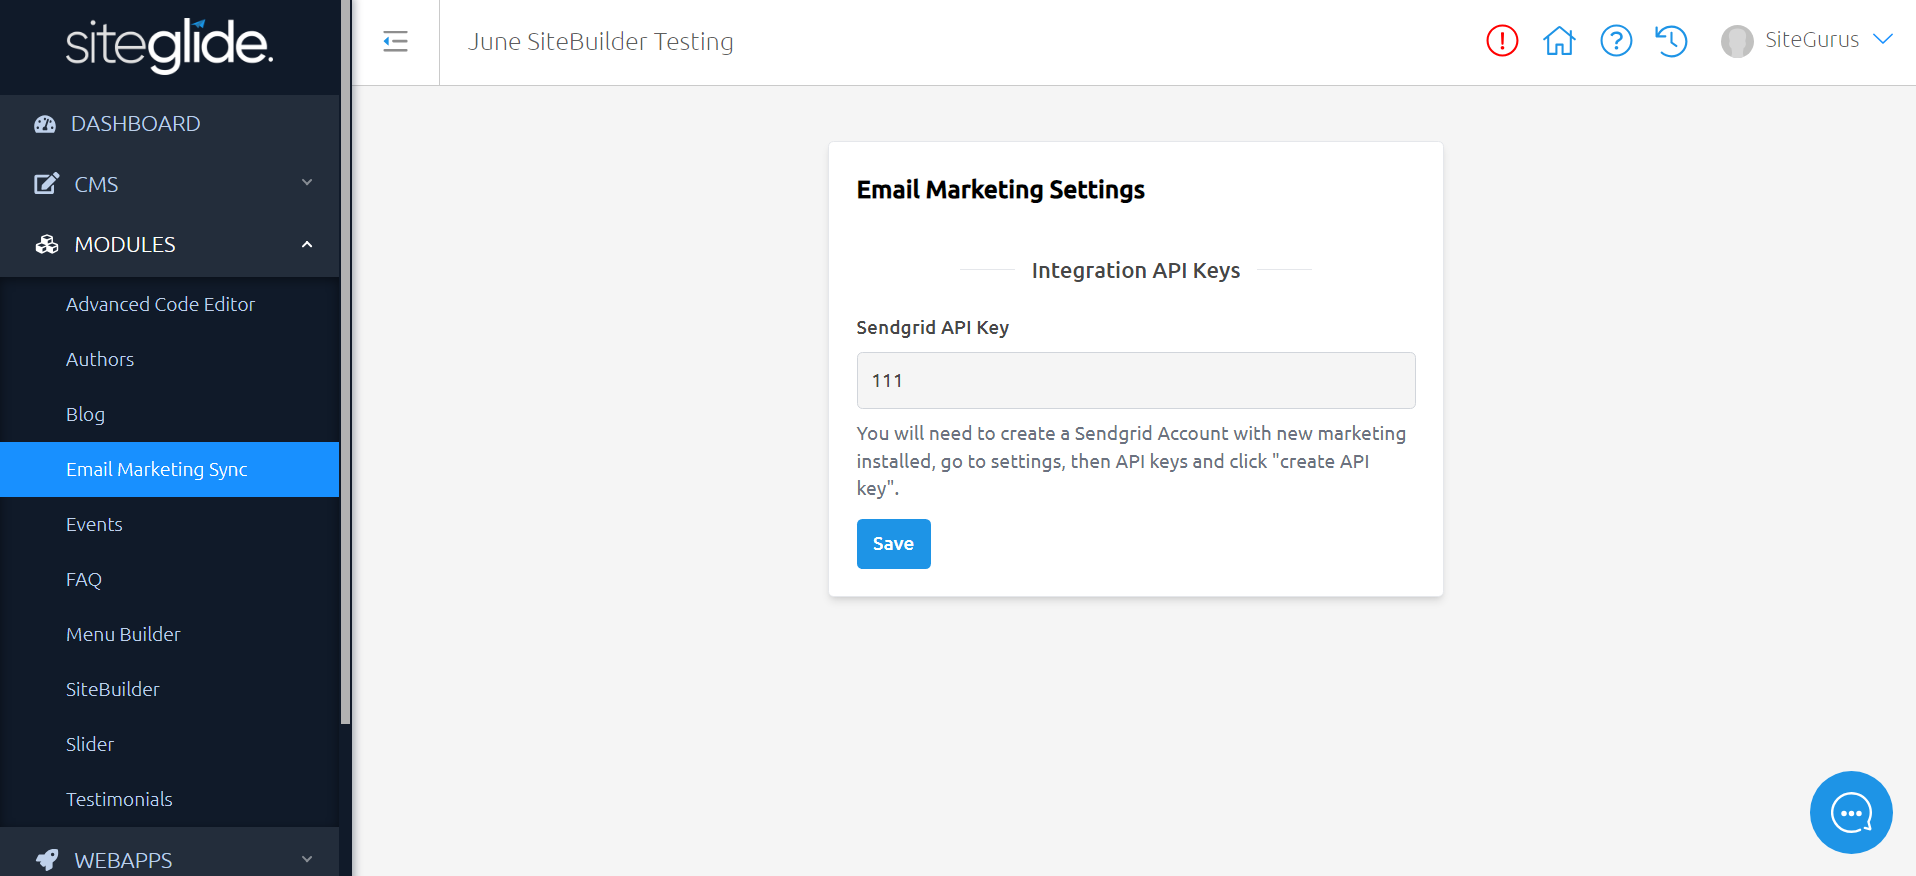
Step 1) Setting up your API key
The first thing you will need to do to use this module is create an account with an e-marketing provider. For now, we only support Sendgrid, but please let us know if you have a feature request to support another. Please follow Sendgrid's own support for help getting this set up.
Once you're logged in, you need to create an API key.
The API key can be added to the module in the Siteglide Admin:
You're now ready to add some simple code.
Step 2) Create a Form with an Automation
It is probably simplest to choose Custom Action as the Automation type, or you could add the code on Step 3 to an existing email or API automation.
See the Forms and Automations sections.
Step 3) Include a Line of Liquid to Sync the Sumitted User Data to your CRM
The Liquid include
The module provides you with Liquid code which, when run, carries out a range of actions using the details of the Siteglide CRM user who submitted the form and triggered the automation.
Parameters
The following parameters can be used to modify behaviour:
marketing_provider required
At the moment, as we only support Sendgrid, this should be set to sendgrid. In future this may allow others to be selected.
action - add or update_if_added or remove required
This parameter controls essentially whether you wish the contact to be added or removed from the system, however, its behaviour is further modified by the lists parameter.
If the lists parameter is not included: add will add the contact to the marketing provider; remove will delete the contact from the e-marketing provider.
update_if_added is similar to add, but is designed for use-cases where you do not know if the user in question has given consent to receive marketing material. It will not create a new contact, but if a contact with that email address already exists, it will update custom fields to the latest Siteglide CRM data.
lists
Setting this parameter further modifies the behaviour of the previously discussed action parameter.
lists can be set to a comma-separated list of strings, where each string is an exact spelling to the name of a list in Sendgrid e.g.
The above example will add the contact to both lists.
Unlike custom-fields which are automatically synced to Sendgrid and created there, lists cannot be automatically created by the module API. They must be manually created in the Sendgrid portal first.
If the lists parameter is set: add will both add the contact and add them to all of the given lists. remove will remove the contact from all given lists, but will not delete them as a contact.
If you do wish to delete the contact completely, remove the lists parameter.
reserved_fields
The module automatically creates custom fields when you use the code to sync a contact, but Sendgrid also has "reserved fields" for storing data. The module will fill in some reserved fields automatically, like name and email address. But others will not be filled in automatically.
You can use the reserved_fields parameter to map Siteglide data into those reserved fields (optionally). To do this, first use the parse_json tag from platformOS or equivalent to create a liquid object, where the keys are exact matches for sendgrid reserved field names, and the values can be anything- hardcoded or dynamic Liquid data. Then pass the object in as the value of the parameter.
email
In most cases, adding the email parameter is unecessary as it will default to the value of {{form.properties.email}} which would be available inside a Siteglide automation for example.
However, if your use case requires running the code in a situation where this is not available, you can pass in the email address as a string instead:
Last updated
Was this helpful?